Sewalong à la robe Milana VikiSews

Créateur : Catherine Holbrook
IG : ramener la couture
Youtube : @bringingsewingback
-----------------------------------------------
Niveau de compétence : Débutant avancé

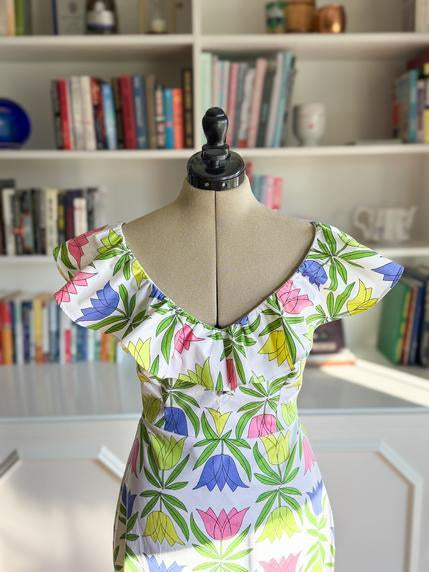
Descriptif : Avec le réchauffement des températures à travers le pays, les robes printanières remplissent les étagères de tous les magasins. Alors pourquoi ne pas en fabriquer un sur mesure pour vous-même ?! Le couteau Olfa Beginner est l’outil idéal à avoir sous la main pour démarrer tout nouveau projet. Le revêtement de lame inspiré de la sécurité vous offre le précision vous devez réussir chaque coupe - surtout lorsque les coutures déchirent toutes ces coutures oopsies que nous cousons ! Suivez ce tutoriel pendant que je vous montre comment créer votre propre robe Milana en un seul après-midi de couture.
La robe Milana est un modèle GRATUIT du créateur VikiSews. Fabriquée en tissu tissé, cette robe volantée est le projet parfait pour tout ce tissu que vous avez caché dans votre collection. Ce tutoriel vous apprendra comment coudre la pince parfaite sans froncer et comment allonger la robe pour obtenir une longueur midi, si vous le souhaitez.
Outils et fournitures nécessaires:

Tissu tissé léger à moyen avec une touche de structure tel que : satin, popeline, lin, oeillet, chemise en coton opaque, batiste. (Mètre basé sur la taille, voir patron)
Le patron GRATUIT de la robe Milana de Viki Sews sera utilisé pour ce tutoriel et peut être téléchargé sur le lien ci-dessous. ici.
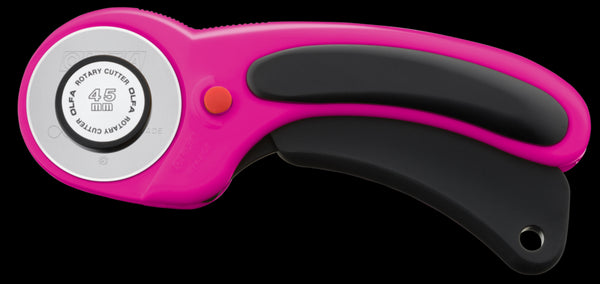
OLFA Coupeur rotatif ergonomique RTY-2DX/MAG 45 mm
OLFA Lame rotative d'endurance en acier tungstène de 45 mm
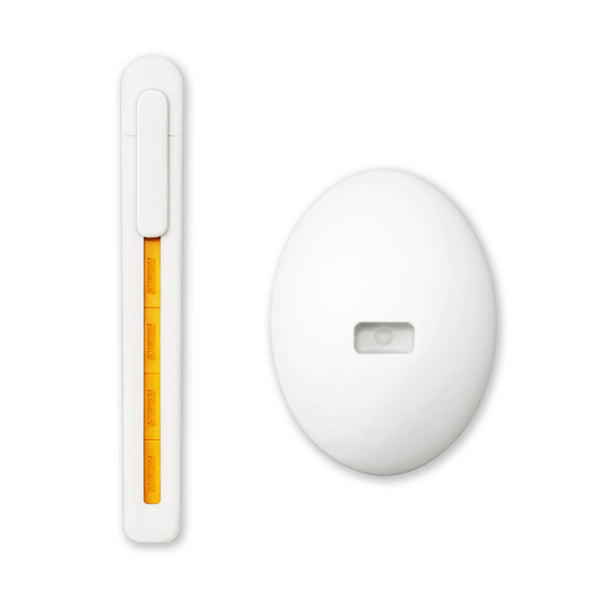
OLFA Couteau artisanal pour débutant ESK-1 avec support
OLFA Règle en acrylique givré QR-6x12 6" x 12"
OLFA Ciseaux pour appliqués de précision SCS-4 de 5 pouces
Préparation :
Nous commencerons par imprimer et assembler le patron de la robe Milana ou par télécharger le fichier projecteur. Un fichier de projecteur sera utilisé pour ce tutoriel.
Pour ce projet, vous découperez les pièces suivantes :
2 corsages principaux sur le devant et 2 doublures sur le corsage avant comme ensemble d'images miroir
2 corsages principaux au dos et 2 doublures du corsage arrière comme ensemble d'image miroir
2 volants sur l'encolure avant comme ensemble d'image miroir
2 volants au dos comme ensemble d'image miroir
1 jupe avant principale et 1 doublure de jupe avant
1 jupe arrière principale et 1 doublure de jupe arrière
1 volant de jupe avant
1 volant de jupe arrière
2 attaches au dos
2 biais Armscye

*Si vous allongez la jupe jusqu'à la longueur midi, coupez la ligne d'allongement/raccourcissement à l'aide du cutter pour débutant et écartez-la de 9 pouces. Redessinez les coutures latérales en reliant la ligne d'allongement/raccourcissement au nouveau bord inférieur. NE PAS redessiner en reliant le point de taille à l’ourlet. Cela réduira la quantité d’aisance au niveau des hanches.


*Si à un moment donné une couture est mal cousue, le couteau artisanal pour débutant peut être utilisé pour déchirer les points. Une fois émoussées, les lames peuvent être disposées dans le récipient situé au bas du support. Consultez olfa.com pour savoir où acheter des recharges.

Tutoriel de couture :
*Notez que les étapes répertoriées ci-dessous diffèrent légèrement du tutoriel fourni par Viki Sews. Cela a été fait pour simplifier les étapes de couture.
Préparation des pièces et construction des fléchettes du corsage :
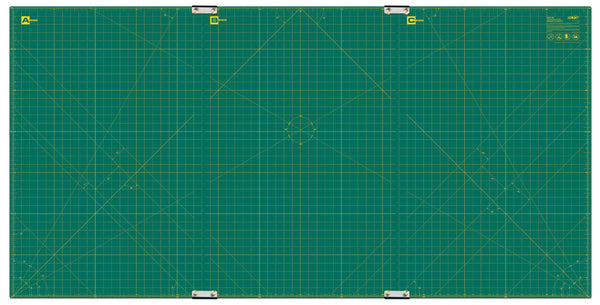
En utilisant le Coupeur rotatif ergonomique de 45 mm et le tapis rotatif à grille continue, découpez les morceaux répertoriés ci-dessus. Si vous constatez que votre tissu bouge sur vous pendant la coupe, la règle en acrylique givré peut vous aider à obtenir une coupe précise !


Transférez toutes les marques de fléchettes sur les pièces du corsage avant à l'aide d'un morceau de craie ou d'un marqueur lavable. N'oubliez pas de repasser vos pièces de tissu !


PlierEn plaçant le tissu endroit contre endroit, alignez les pattes des pinces sur la pièce principale du corsage avant. Presse. En commençant par le bas de la pince, cousez vers l’intérieur et vers le haut vers le sommet de la pince. Ne faites pas de point arrière au sommet de la fléchette. Cela créera un éventuel pli et des points supplémentaires inutiles. Lorsque le sommet de la pince est atteint, cousez le tissu et laissez une queue de fil.


Attachez les queues de fil dans un nœud simple pour sécuriser la couture au sommet. Coupez l'excédent de fil à l'aide du Appliqué de précision Ciseaux.


Appuyez sur la pince vers le bas du corsage. Badigeonner en place. Répétez ces étapes pour toutes les pinces restantes sur les pièces de tissu principale et de doublure. Assurez-vous d'appuyer sur les pinces dans le sens opposé sur les pièces de doublure.


Placez les pièces principales du corsage devant et dos endroit contre endroit, en alignant les épaules. Cousez sur la couture de l'épaule et appuyez sur la valeur de couture pour l'ouvrir. Répétez l’opération pour les pièces de doublure du corsage avant et arrière.


Construire et finir les volants :
Placez les volants de l'encolure devant et dos endroit contre endroit, en alignant les bords des épaules. Notez que les bords des épaules sont les extrémités les plus grandes. Cousez sur la couture de l'épaule et appuyez sur la valeur de couture pour l'ouvrir.


Terminez les coutures en utilisant votre méthode préférée. Le surfilage sera montré dans ce tutoriel.

Placez les volants de la jupe avant et arrière endroit contre endroit, en alignant les bords latéraux aux deux extrémités. Cela créera un morceau de tissu circulaire. Cousez sur les coutures latérales et ouvrez les surplus de couture. Terminez les coutures.


Terminez l'ourlet de toutes les pièces à volants en utilisant votre méthode préférée. Pour ce tutoriel, un pied pour ourlet étroit sera utilisé pour la finition. Ce pied permet au tissu de rouler sur lui-même, ce qui donne une finition nette et un ourlet étroit. Appuyez à plat.


Fixation des volants et finition du corsage :
En utilisant votre méthode préférée, rassemblez le bord supérieur de toutes les pièces de volants. Un pied volant sera utilisé dans ce tutoriel. Ce pied rassemble le tissu uniformément à chaque point, éliminant ainsi le besoin de rassembler la main à la fin.


Placez le volant de l'encolure endroit contre endroit sur les pièces principales du corsage, en alignant les bords bruts du volant avec les bords centraux du corsage avant et arrière. Assurez-vous que le tissu est froncé à l'ouverture exacte comme pièces principales du corsage, en faisant correspondre les coutures des épaules. L’envers des volants de l’encolure doit toucher le côté droit des pièces principales du corsage (les deux sont face vers le haut). Coudre pour fixer le volant à l'encolure. Notez que le volant arrière se trouvera à 3/8" au-dessus du bord inférieur arrière.


Avec les côtés endroit contre endroit, cousez les pièces principales du corsage devant ensemble au bord central du devant. Appuyez sur la marge de couture pour l'ouvrir. Répétez avec les pièces de doublure du corsage avant.


Placez les pièces du corsage devant et dos endroit contre endroit et cousez les coutures latérales. Appuyez sur la marge de couture pour l'ouvrir. Répétez avec les pièces de doublure du corsage avant.


Construire les liens :
Pliez le morceau de cravate arrière en deux, endroit contre endroit. En commençant par ce point, cousez tout le bord latéral de la cravate, en laissant le petit bord brut ouvert. Coupez la marge de couture et retournez-la. Appuyez sur.


Surpiquez autour du périmètre des attaches avec un surplus de couture de 1/8". Répétez l’opération pour le reste de la cravate.


Avec les pièces principales du corsage arrière endroit contre endroit, placez les attaches du dos 3/8" au-dessus du bord inférieur. L'extrémité de l'attache doit être alignée avec l'extrémité du volant. Assurez-vous que la couture des attaches est tournée vers le bas du corsage. Cousez en place.


Construire la jupe :
Placez les pièces principales de la jupe avant et arrière endroit contre endroit et alignez les coutures latérales. Cousez pour fixer les coutures latérales et repassez la marge de couture pour l'ouvrir. Terminer les coutures.


Répétez avec les pièces de doublure de la jupe avant et arrière. Terminez l’ourlet du bas.


Avec la jupe principale tournée vers l'endroit et le volant de la jupe froncée vers l'envers, glissez le volant de la jupe froncée sur la jupe principale en alignant le bord inférieur de la jupe. Coudre pour attacher. Terminez les coutures.


Repassez la valeur de couture vers la jupe et surpiquez si vous le souhaitez.


Finition de la robe avec la doublure :
Placez les pièces principales du corsage et la doublure du corsage, endroit contre endroit, en alignant le bord de l'encolure. Assurez-vous que les attaches arrière sont prises en sandwich entre les pièces principales du corsage et la doublure, et que la queue n'est pas coincée dans les coutures. Cousez le long de l'encolure et de l'ourlet du corsage arrière pour l'attacher. Assurez-vous de NE PAS coudre sur l’ourlet du corsage avant.


Coupez les coins et les surplus de couture sur les courbes, et sous-piquez la doublure si vous le souhaitez. Retournez le corsage sur l’endroit. Presse.


Bâtissez le corps principal et la doublure ensemble le long de l'ourlet du corsage avant.

Fixez le biais le long des emmanchures selon les instructions du patron.


Placez les pièces principales de la jupe et la doublure de la jupe endroit contre endroit, en alignant le bord brut supérieur du dos uniquement. Cousez la jupe arrière entre les coutures latérales, en laissant le bord brut supérieur de la jupe avant non cousu.


Retournez la jupe sur l’endroit et appuyez sur le bord supérieur arrière. Cousez une autre ligne droite à 1/2" du bord supérieur. Cela créera un boîtier élastique dans lequel insérer votre élastique de 3/8".


Bâtissez le bord brut supérieur de la jupe principale et de la doublure. Placez le corsage devant et le devant de la jupe côtés droits ensemble en alignant le bord inférieur du corsage devant avec le bord supérieur du devant de la jupe. Coudre pour attacher.


Terminez la valeur de couture et repassez vers le corsage. Il est recommandé de maintenir les surpiqûres en place.


En séparant les pièces principales du dos de la jupe et de la doublure, insérez l'élastique dans le canal que vous venez de coudre à l'aide d'un passe-passe ou d'une épingle de sûreté. Fixez l'élastique aux extrémités en cousant dans le fossé au niveau des coutures latérales.


Donnez une dernière pression à la robe et profitez de cette silhouette printanière parfaite !


