Sewalong à la combishort d'été par Peppermint Magazine

Créateur : Catherine Holbrook
IG : ramener la couture
Youtube : @bringingsewingback
-----------------------------------------------
Taille ou dimensions : modèle de référence pour connaître les exigences exactes en matière de tissu pour votre taille
Niveau de compétence : Débutant avancé


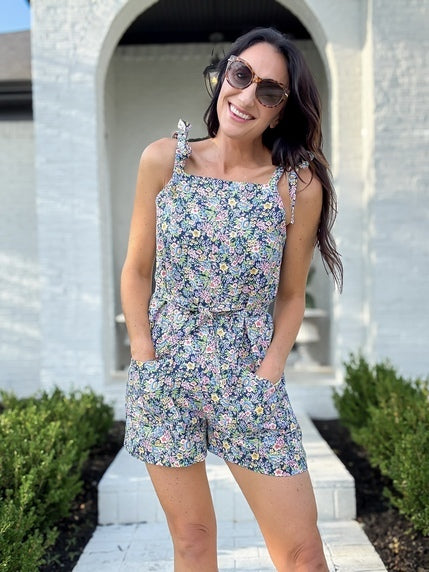
Descriptif : L’été signifie se détendre pour la plupart d’entre nous. Avec la fin de l’école et la hausse des températures, il n’y a rien de mieux que d’enfiler une tenue confortable et de sortir dehors pour profiter du soleil. Insérez le combishort d'été de Peppermint Magazine !
Cet incontournable de la garde-robe facile à porter est la tenue parfaite à coudre cet été ! Bien que plus ajustée au niveau du buste, la combishort se desserre autour de la taille et des hanches, lui donnant une coupe aérée pour se rafraîchir sous le soleil d'été. Il comporte des poches plaquées pour ranger facilement votre téléphone et des bretelles à nœuds les plus adorables.


Ce tutoriel vous guidera non seulement pas à pas tout au long du processus de couture de la combishort d'été, mais il vous apprendra également à créer une ceinture amovible pour un effet cintré. Le tout personnalisé à vos propres mesures ! Prenez votre règle en acrylique givré et passons à ce tutoriel !
Outils et fournitures nécessaires:

2-3 mètres de tissu tissé léger à moyen tel que : lin, mélanges de lin, coton, gaze, chambray.
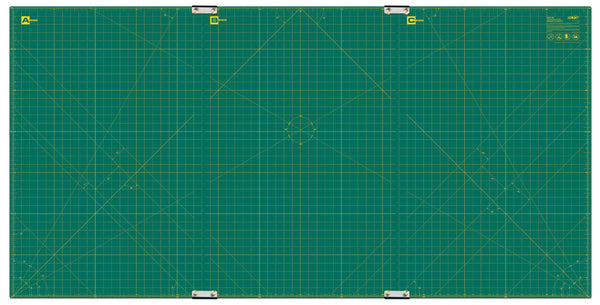
Coupeur rotatif ergonomique RTY-2DX/MAG 45 mm
Lame rotative OLFA Endurance de 45 mm
Règle en acrylique givré QR-6x12 6" x 12"
Règle en acrylique givré QR-1x12 1" X 12"
Règle en acrylique givré QR-6x24 6" X 24"
Appliqué de précision SCS-4 de 5 pouces Ciseaux
1 fermeture éclair invisible de 16 pouces
Le combishort d'été GRATUIT de Peppermint Magazine numéro 40 sera utilisé pour ce didacticiel et peut être téléchargé sur le lien ci-dessous. TÉLÉCHARGEMENT GRATUIT
Préparation :
Nous commencerons par imprimer et assembler le patron du Summer Playsuit (ou à l'aide d'un projecteur). Avec le le Coupeur rotatif ergonomique de 45 mm et le tapis rotatif à grille continue, découpez les morceaux répertoriés ci-dessous. Si vous constatez que votre tissu bouge sur vous pendant la coupe, les règles en acrylique givré peuvent aider à stabiliser le tissu, vous offrant ainsi une coupe précise !

Pour ce projet, vous découperez les pièces suivantes :
Devant - coupe 2 comme ensemble d'images miroir

Retour - coupe 2 comme ensemble d'images miroir

Face avant - coupe 1
Face arrière - coupe 1
Poche plaquée - coupe 2
Sangle avant - coupe 2
Sangle arrière - coupe 2

Tutoriel de couture :
Nous commencerons par coudre les bords supérieurs des pièces du devant et du dos. Pour Staystitch, réduisez la longueur de votre point droit à 1,5 mm et cousez un point à 1/4" du bord brut. Cela empêchera les bords de s'étirer puisqu'ils sont coupés en biais.


Préparation des pièces :
Marquez toutes les pièces avec leurs encoches correspondantes. Assurez-vous de transférer les repères de placement des poches sur le côté droit des deux devants.

Coudre les poches :
En localisant les pièces de poche, terminez le bord supérieur avec votre méthode de finition préférée. Le bord supérieur est le bord avec les encoches à 1" du bord brut. Ce tutoriel terminera toutes les pièces à l'aide d'une surjeteuse.

Avec l'endroit vers le haut, retournez le bord supérieur de la poche vers le bas de 1" (au niveau des encoches), de sorte que la partie rabattue soit l'envers vers le haut. Votre règle en acrylique givré de 1" X 12" a la taille parfaite pour mesurer cela. Appuyez.


Cousez chaque côté de la partie rabattue à 3/8" du bord des deux côtés.

Coupez les coins avec votre 5 pouces Appliqué de précision Ciseaux, et terminez autour des 3 bords bruts restants de la poche.


Tournez le bord supérieur sur l’endroit, en appuyant sur les coins avec un outil pour qu’ils aient un bord pointu. Je préfère utiliser la pointe de mon 5 pouces Appliqué de précision Ciseaux pour cette étape. À l'aide de votre fer, appuyez sur les trois bords à 3/8" vers l'arrière de la poche. Cela créera des bords sans couture pour la poche. Appuyez complètement sur la poche.


Sur l'envers du tissu, surpiquez le bord supérieur rabattu à 1/8" du bord surjeté, pour le maintenir en place et créer un aspect fini à la poche.


Répétez les étapes précédentes avec la poche restante.

En utilisant les encoches comme guide, positionnez chaque poche sur le côté droit de chaque devant, endroit contre endroit vers le haut. Épinglez en place. Cousez les poches sur les pièces du devant autour des bords latéraux et inférieurs avec un surplus de couture de 1/4".


Installation de la fermeture éclair invisible :
Localisez les pièces avant et arrière. Terminez les côtés extérieurs des quatre pièces.

Localisez le côté gauche des pièces avant et arrière et placez l’autre paire sur le côté. Le côté gauche est le côté sur lequel nous allons installer la fermeture éclair. Voir la photo ci-dessous pour localiser les pièces latérales gauche.

Retournez les deux pièces de manière à ce qu'elles aient le côté droit vers le bas. Pour créer un pli à mémoire de forme pour une installation plus facile de la fermeture éclair, appuyez sur la marge de couture de 1/2" sur l'envers. Dépliez la marge de couture pour révéler le pli à mémoire.


Localisez la fermeture éclair invisible de 16 pouces et décompressez-la jusqu'au bout. Sur le devant, placez le zip face vers le bas sur le côté du devant gauche. La butée de la fermeture à glissière doit être placée à 3/8" du bord supérieur. Alignez les dents de la fermeture à glissière avec le pli de mémoire créé précédemment.


Épinglez la fermeture éclair et faufilez-la sur le devant à l'aide d'un pied pour fermeture éclair (ou à la main). Pour faufiler le point, ajustez la longueur de votre point droit à 6 mm (ou aussi haut que le permet votre machine).


À l’aide d’un pied pour fermeture éclair invisible (ou d’un pied pour fermeture à glissière avec l’aiguille la plus à gauche), cousez la fermeture à glissière en place avec un point droit ordinaire.

Localisez la pièce arrière. Répétez les étapes ci-dessus en positionnant la fermeture éclair sur le côté gauche du dos de la même manière. Assurez-vous que la fermeture éclair n’est pas tordue avant de la mettre en place.

Faites une vérification rapide en fermant la fermeture éclair vers le haut. Si la fermeture éclair n’est pas tordue et alignée correctement, utilisez une fermeture éclair invisible pour la coudre en place.


Pliez les pièces du devant et du dos endroit contre endroit et épinglez le reste de la couture latérale fermée (sous l'extrémité de la fermeture éclair). Cousez du bas de la fermeture éclair jusqu'à la fin de la couture avec un surplus de couture de 1/2". Il est recommandé d'utiliser un pied pour fermeture à glissière ordinaire afin de pouvoir vous rapprocher le plus possible de l'extrémité des points de fermeture à glissière.


Appuyez sur la marge de couture pour l'ouvrir.

Finition du corsage :
Terminez les bords bruts du milieu devant et du milieu dos, en continuant à travers chaque couture intérieure de jambe.

Placez les coutures intérieures des jambes avant et arrière, endroit contre endroit. Cousez un point droit avec un surplus de couture de 1/2". Appuyez sur la couture pour l'ouvrir.


Localisez les deux pièces restantes du devant et du dos. Terminez les bords bruts du milieu devant et du milieu dos, en continuant à travers chaque couture intérieure de jambe.

Placez le devant et le dos endroit contre endroit et cousez les coutures latérales et les coutures intérieures des jambes avec un surplus de couture de 1/2". Appuyez sur la couture pour l'ouvrir.


Nous allons maintenant relier les deux pièces ensemble le long de la couture de l'entrejambe. Retourner une pièce devant/dos envers contre envers et laisser les autres pièces endroit contre endroit. Insérez la pièce extérieure sur l'endroit dans la pièce extérieure sur l'envers, en alignant les hauts, les encoches et la couture intérieure de la jambe. Épinglez en place.


Cousez ensemble en utilisant un surplus de couture de 1/2". Appuyez pour ouvrir.

Coudre les bretelles :
Localisez une sangle. Placez la sangle envers contre envers vers le haut et pliez chaque côté long vers l'arrière de 3/8". Presse.


Pliez une extrémité courte vers l'arrière de 3/8" de pouce et appuyez.

Pliez la sangle en deux dans le sens de la longueur, envers contre envers, de sorte que chaque côté soit maintenant endroit contre endroit vers l'extérieur. Assurez-vous que le pli de l’extrémité courte est entièrement fermé (coupez-le si nécessaire).

Cousez sur toute la longueur de la sangle à 1/8" du bord, en pivotant et en continuant vers l'extrémité courte.

Répétez les étapes précédentes pour les trois sangles restantes.

Fixation des sangles :
À l'aide d'un marqueur et de votre règle en acrylique givré de 1" X 12", marquez deux lignes directrices de chaque côté du bavoir avant. La première ligne directrice sera marquée à 3/8" du bord supérieur. La deuxième ligne directrice sera marquée à 3/8" du bras. Ces repères tiennent compte de la marge de couture qui devra être cousue lors de la fixation de la parementure.


Localisez une sangle avant et alignez-la sur la ligne directrice, de sorte que les points sur les sangles soient orientés vers les coutures latérales. Étendez la sangle de 1" au-delà du haut et cousez en place avec un surplus de couture de 1/4". Répétez avec la sangle avant restante.


Localisez une sangle arrière et placez-la entre les deux encoches arrière, en l'étendant de 1" au-delà du haut. Assurez-vous que les points de la sangle sont orientés vers la couture latérale. Cousez en place avec un surplus de couture de 1/4". Répétez avec la sangle arrière restante.

Préparation et fixation du parement :
Localisez les faces avant et arrière. Surveillez le point à 1/4" du bord supérieur et terminez chaque couture latérale.

Placez le recto et le verso endroit contre endroit. Cousez la couture du côté gauche avec un surplus de couture de 1/2". Le côté droit restera non cousu.

Appuyez sur la marge de couture pour l'ouvrir. Finir les surplus de couture latéraux et le bord inférieur de la parementure avec la valeur de couture ouverte.

Placez la parementure sur le combishort endroit contre endroit, en alignant les coutures latérales, les encoches et les lignes directrices. Retournez les bords de la fermeture éclair. Alignez la couture latérale de la parementure avec le bord de la fermeture éclair installée. Épinglez en place.


Cousez tout le haut de la parementure et le long du bord de la fermeture éclair avec un surplus de couture de 3/8". Clipsez dans les coins et coupez le surplus de couture. Si vous le souhaitez, vous pouvez sous-coudre le surplus de couture sur la parementure.


Retournez la parementure vers l'intérieur du vêtement et repassez. Si vous le souhaitez, la parementure peut être cousue dans le fossé au niveau de la couture latérale et au centre de l'hydravion arrière pour maintenir la parementure retournée vers l'intérieur. Essayez la combishort et attachez les bretelles en un nœud au bon endroit pour votre corps.

Ourler la combishort :
Terminez le bord inférieur de chaque jambe de pantalon.

Relevez l'ourlet de 1 1/4" sur l'envers de chaque pantalon et repassez. Épinglez en place. Essayez la combishort pour vous assurer que la longueur ourlée est souhaitée. Ajustez si nécessaire. Si vous souhaitez un ourlet plus court, il est recommandé de le replier une fois de plus.

Une fois la longueur préférée épinglée en place, cousez autour de chaque ouverture de jambe près du bord de la marge de couture.


Votre combishort est prête à porter !

Si vous souhaitez un cintrage à la taille, vous trouverez ci-dessous un tutoriel sur la façon de créer une ceinture personnalisée à vos mesures exactes !
Création d'une ceinture personnalisée :
Pour commencer, nous utiliserons la formule suivante :
Longueur de la ceinture = Tour de taille + 30 pouces
Largeur de la ceinture = 2,5"
Une fois que vous avez pris votre propre tour de taille, ajoutez 30 pouces à ce nombre et cela devient la longueur du morceau de tissu que vous devez couper. En fonction de la largeur de votre tissu, vous devrez peut-être diviser ce nombre en deux et couper deux morceaux au lieu d'un long morceau.
Exemple personnel : ma taille mesure 29 pouces et mon tissu mesure xx de large. Je vais couper un morceau de tissu qui est : 59 pouces x 2,5”
Coupez votre ceinture. Pliez les côtés endroit contre endroit et appuyez.


À chaque extrémité courte, mesurez 1,5" du côté brut et faites une marque. À l'aide de votre règle en acrylique givré de 1" X 12" et Coupeur rotatif ergonomique de 45 mm, alignez la marque avec le bord plié et coupez l'excédent de tissu.


En commençant à une extrémité de la ceinture, cousez sur le bord brut avec un surplus de couture de 1/4" jusqu'à ce que vous atteigniez le point central. Faites un point arrière et coupez vos fils. Recommencez à 2" de votre point d'arrêt précédent et continuez à coudre autour du bord brut jusqu'à ce que vous rencontriez l'autre côté. Cela laissera un espace de 2" de points au centre de la ceinture.


Tournez le châssis sur l'endroit entre cet espace de points de 2". Appuyez.


Cousez tout le tour de la ceinture avec un surplus de couture de 1/8", et vous obtenez une ceinture personnalisée que vous pouvez porter autour de votre combishort !

Cette combishort d'été sera sûrement très portée cet été. Faites-moi savoir si vous y parvenez !